

The most versatile and durable option when installing a floor is with a cement screed that can withstand temperature changes and is resistant to moisture. To achieve a great result, you must strictly adhere to the technology of work.
There are instructions that you need to follow, and we have prepared a guide that will make the installation of the floor screed easy and simple.
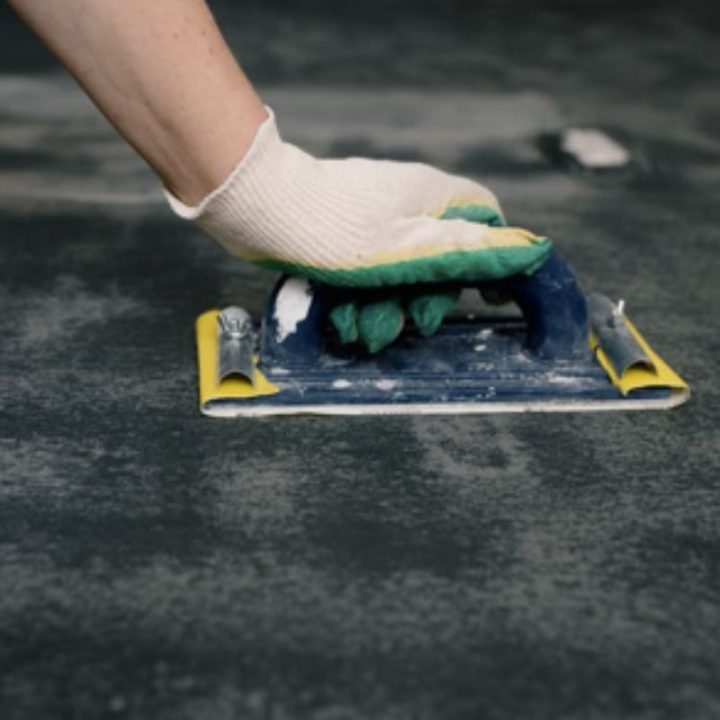
Rough Surface Preparation
The floor screed is poured on the previously prepared surface. If the house has an old wooden floor, bare ground, or concrete slab, then each case should be approached individually. If there are large cracks and dents on the rough surface, which can add to the cost of floor screeding, they need to be cleaned and covered with cement mortar. You can use a sander or concrete milling equipment to sand the concrete floor.
Waterproofing and Reinforcement
You can fill the floor yourself. Cement screed is prepared for this in a certain ratio. Waterproofing should be installed at this stage. To do this, you can use roofing felt and other similar materials that are combined with screed. It is important to remember that the mortar must adhere well to the substrate. A universal primer is most often used to increase adhesion characteristics.
It takes about 4 hours for the surface to dry after applying the primer. If the floor absorbs moisture well, then it should be coated twice; otherwise, it will not be possible to achieve a positive result.
Pouring the Solution
The filling of the floor screed must be accompanied by leveling. The tracks between the rails should be filled by moving towards the door. A straightener or spatula should be used to level the solution. If it is necessary to arrange a multi-layer screed, additional plywood formwork is installed, thanks to which the solution will not flow into the adjacent area. At the highest point, the layer of screed should be 2 cm thick; otherwise, the surface will be covered with cracks. This parameter should not exceed 8 cm because the load on the foundation will be unjustified as the most suitable option protrudes 5 cm.
The Process of Pouring
Every experienced craftsman understands perfectly well that the key to successful work on floor leveling is a properly prepared solution, in which all the necessary components are mixed into the right ones.
According to the technology, the screed is not only durable—it can easily withstand any load and has the necessary thermal conductivity.
For the preparation of screed, it is recommended to use cement grade not lower than M400, a sand fraction of 0.9 mm, and water in a ratio of 1:3. If necessary, the solution can be added with special modifiers, fillers, and plasticizers, which will make the mixture more plastic and give it additional features. It is recommended to add a plasticizer to the solution to improve the quality of the screed.
The solution can be prepared either traditionally by hand, or to make life easier on yourself, use a special construction mixer for these purposes. Almost every large vessel is suitable for kneading; as a mixer, you can use a drill or a drill equipped with special nozzles. Such a nozzle is attached to the tool using a special adapter with an insert. Also, the concrete mixer is ideal for preparing the solution. It is a bit expensive and uneconomical to buy it, especially for preparing the floor screed in the house.

Material Needed
The most common material used for pouring is concrete mortar. Before you make a floor screed, you need to collect all the necessary elements and materials. You will need:
- A concrete mixing vessel
- Drill with a special nozzle or construction mixer.
- Hydraulic level
- Ruler
- A marker to mark the area.
How to Pull the Floor Screed
There is nothing to talk about at all—everything is simple. Pour the mixed solution and spread the mixture evenly with a shovel. We lean the ruler on two sides at the same time and pull it towards us with fast translational movements left and right. To completely remove all the excess plaster, you will need to make two or three passes in one place.
The floor screed in the house dries for quite a long time, but you can walk on it the next day. Of course, it is not yet able to withstand mechanical impacts.
This creates the perfect do-it-yourself floor screed filling. It is difficult and problematic, but as a result, you get a perfectly flat surface suitable for laying any floor covering!